Creating the Design
To create the design, start Superbase NG Personal (it can be found in the main program group for Superbase NG). Once it has started running, it should look something like this:
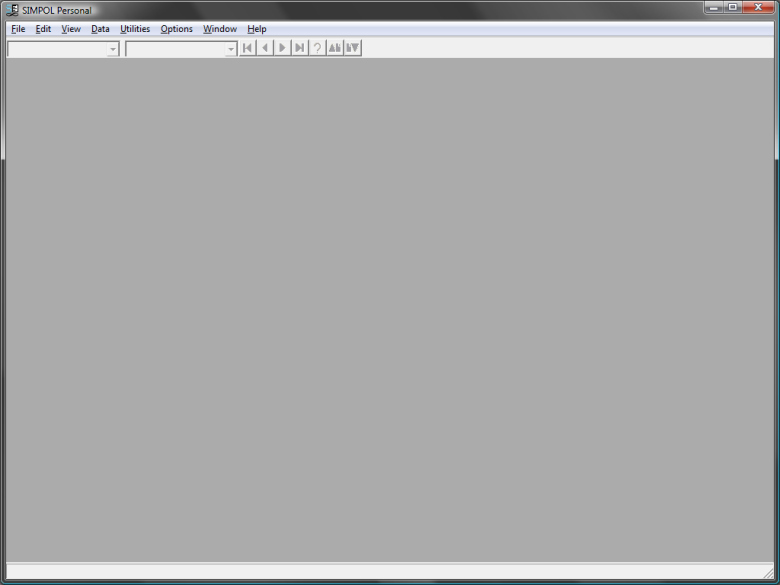
Superbase NG Personal just after being started.
Then select → → from the Superbase NG Personal program to open the Form Designer and create a new form.
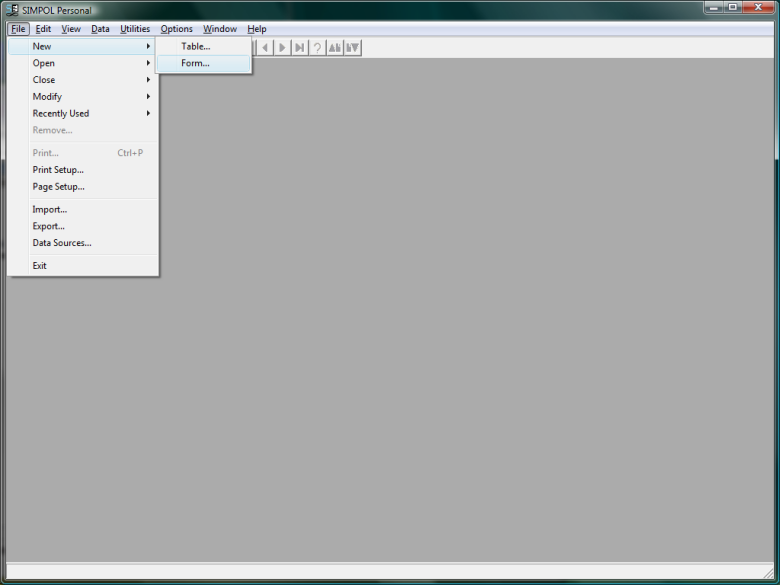
Starting the Form Designer from the Superbase NG Personal program.
Once that has been done, the SIMPOL Form Designer will open and present a picture similar to the one that follows. It contains a blank form sized to a percentage of the size of the screen, with no controls on it.
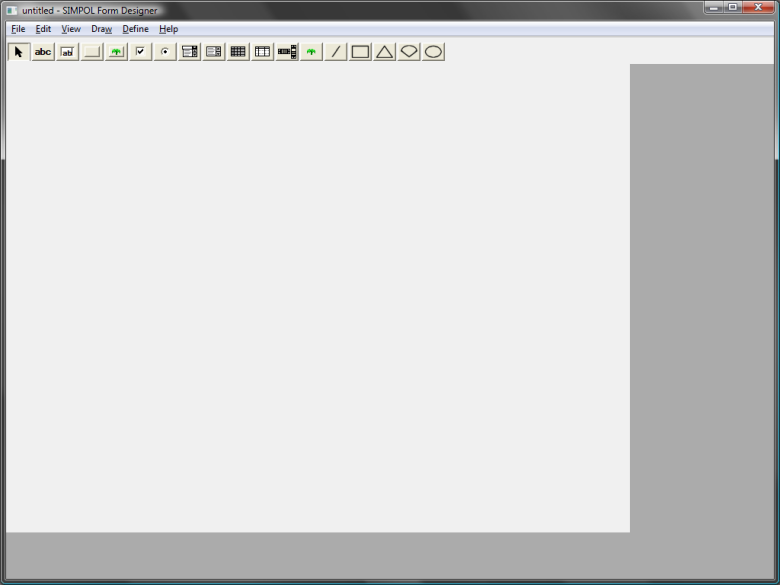
The SIMPOL Form Designer with a new blank form.
Setting the Stage
Now that we have a blank form, it is a good idea to set a few default properties and to give the form a preliminary size. Select → from the menu, or double-click the mouse button on the form to display the Form and Page Properties dialog, which will look something like the one below:
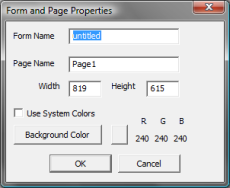
The Form and Page Properties dialog.
Change the both the Form Name and the Page Name to
colorlab. Now click on the Use System Colors check box,
which will default to the CLR_BTNFACE entry. What this does is allow the form to inherit the
system settings for the color scheme. By selecting this setting, the settings for the controls
will also default to using system colors. For now, leave the page size as it is.
![[Note]](images/note.png) | Note |
|---|---|
It is not necessary to work using this approach. If you want to specifically set the colors used for various parts of the form, feel free to do so. Just realize that users expect their applications to look like the other applications that they use and if they do not, they may react negatively to a program, or consider it to be unprofessional. |
After all of our changes, the resulting dialog will look roughly like this:
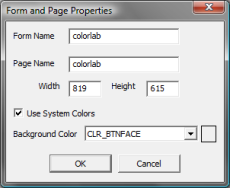
The Form and Page Properties dialog after changes.
Adding the Controls to the Form
It is now time to start adding controls to the form. Start by selecting the abc
button from the tool bar, or by selecting
→ from the menu,
and then using the mouse click the mouse button and while holding
the button down, drag a rectangular outline for the form label. Release the mouse button when the
rectangle represents the area desired for the label. When the button is released, the
Properties dialog window is shown. For now, just set the
Name field to "lHexColorValue" and the
Caption to "Hexadecimal Color Value", leaving the rest
unchanged. The content will be similar to what is shown here:
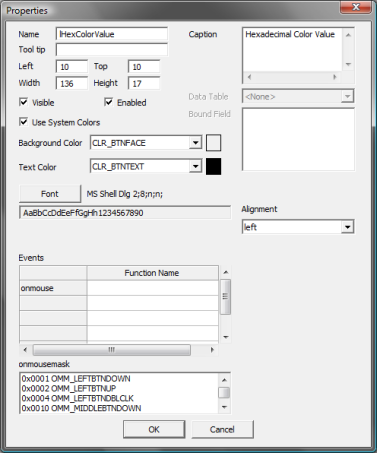
The Properties dialog for a label.
Now add an editable text box to the form, by selecting the ab| button from
the tool bar, or by selecting
→ from the
menu. In the resulting dialog box, set the Name to tbHexColorValue
and in the Events grid, set the value of the onlostfocus
Function Name entry to hexval_olf. This sets the name of
the function that is to be called when the event occurs. The dialog should then look similar to the
one below:
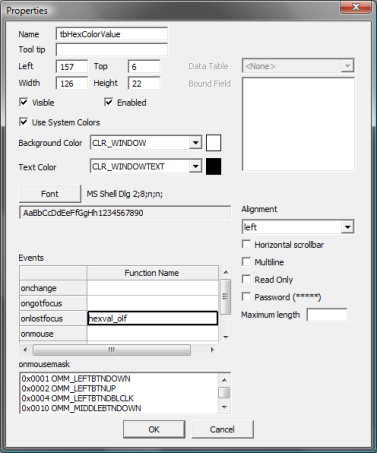
The Properties dialog for an editable text box.
![[Note]](images/note.png) | Note | |||||||||||||||||||||||||||||||||
|---|---|---|---|---|---|---|---|---|---|---|---|---|---|---|---|---|---|---|---|---|---|---|---|---|---|---|---|---|---|---|---|---|---|---|
In the preceding text the two elements have been assigned the names:
Table 5.1. Control Naming Conventions
You may notice that some of the values are used more than once, such as |
Now we add some more labels and edit controls for: the decimal color value, and the red, green, and blue color values. The resulting form looks like this so far:
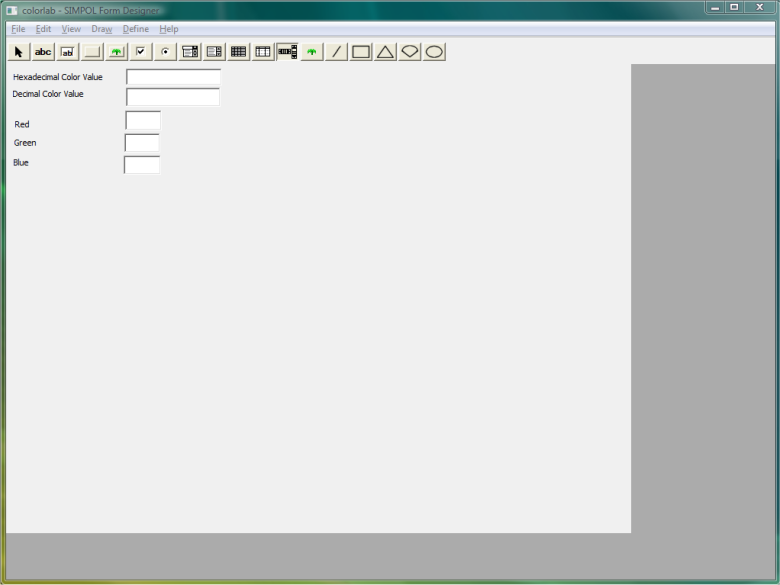
The state of the form after placing two controls.
The form isn't particularly pretty yet, but before we do any cleanup, it may be useful to just plant the rest of the controls on the form. To make things visually more interesting we will use three horizontal scroll bars for controlling the three color components. Select the scrollbars control from the controls palette on the tool bar, or select the → item from the menu. Drag a horizontal rectangle on the form and then set the properties in the dialog as shown in the image below:
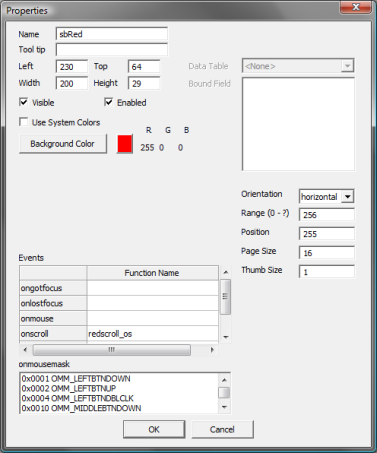
The Properties dialog for a scrollbar.
Please note that the background color of the red scrollbar was set to red. Now do the same again for the green and the blue scrollbars. Once they are on the form, add a rectangle to the form (to show the actual color value). To do this, select the appropriate control from the tool bar or the menu, then drag a rectangle onto the form. The Properties dialog for graphics is considerable simpler in design than that for form controls. Set the values as shown in the image that follows:
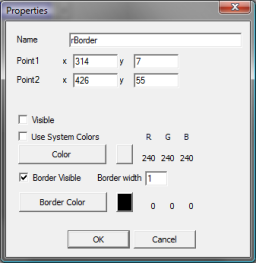
The Properties dialog for a rectangle.
Now that we have added much of the form content, let's take a look at the current state of our form.
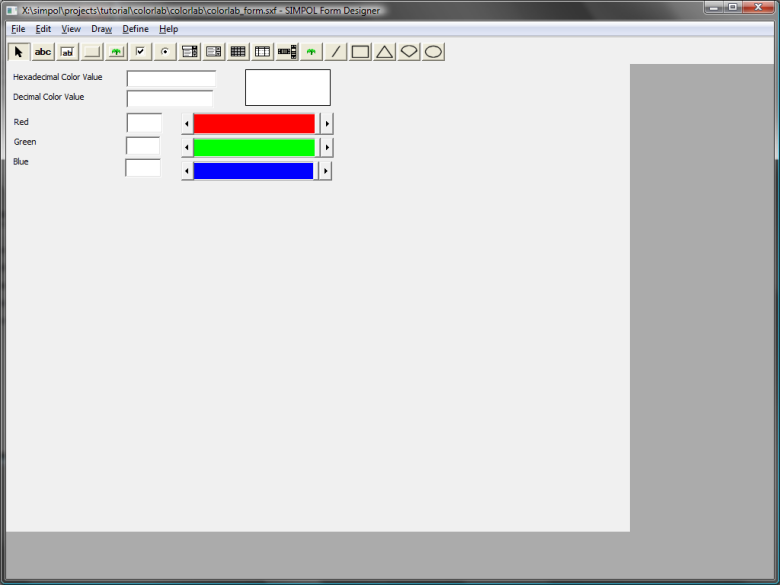
The state of the form after adding most of the controls.
Cleaning Things Up
The form isn't looking too bad, but it just doesn't work very cleanly from a design perspective, so we are going to rearrange things a bit. Make sure the button is selected, and then drag a rectangle around the labels for the red, green, and blue boxes. Make sure they are all sized to not take up too much space beyond what they require (use the sizing handles for this). Now drag select the edit controls and move them over to the left. Resize the blue scrollbar to take up more of the space to the left that has now been made available. The result will look something like the following:
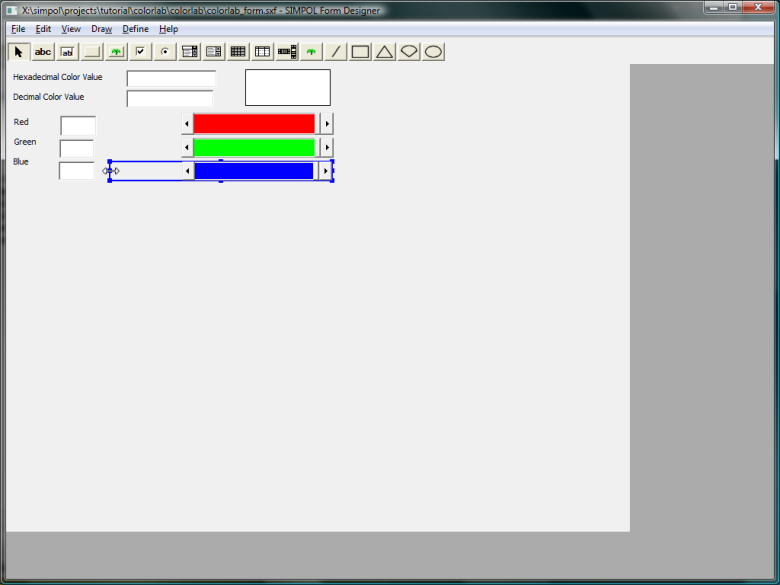
The state of the form after moving the color edit controls and during resizing of the blue scrollbar.
Now drag select the other two scrollbars and after clicking on the selected area with the mouse button, select → , then click on the blue scrollbar that was just resized.
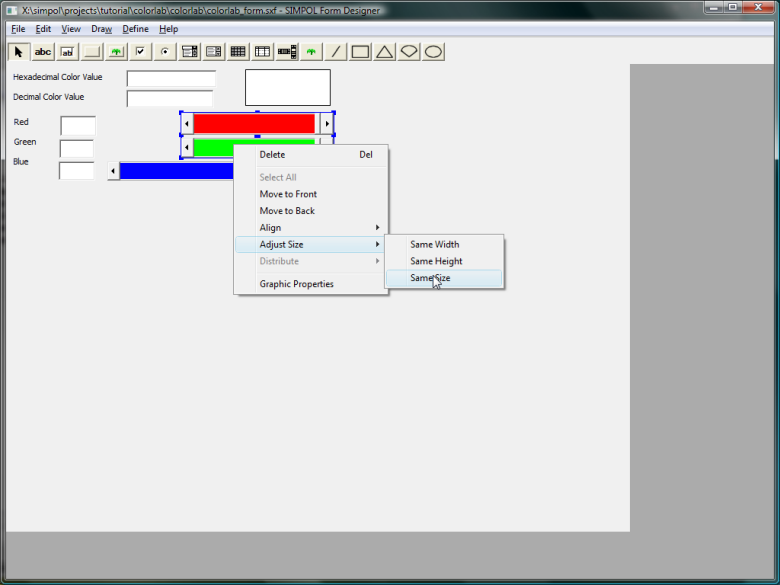
Showing the right-mouse pop-up menu to resize the selection.
This will then resize the selected scrollbars to the same size as the blue one as can be seen in the following image.
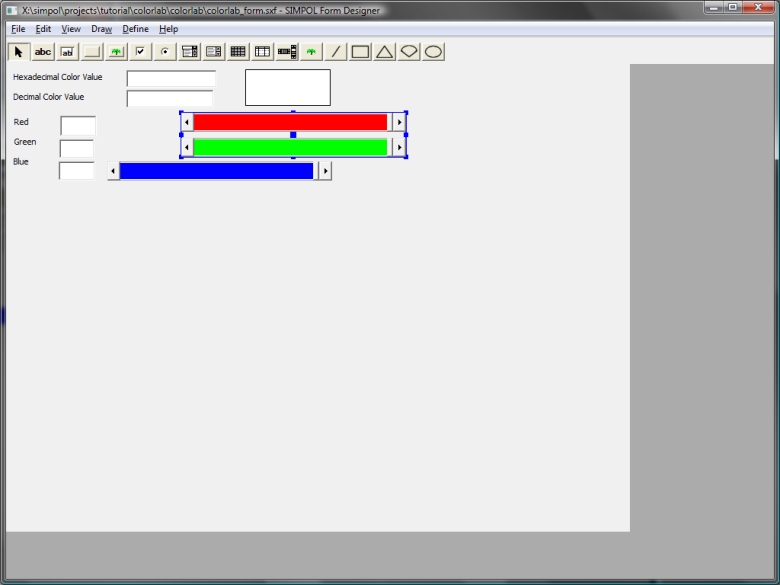
The resulting form after the scrollbars have been resized to match.
We have corrected the size, but they are still in the wrong place. By again clicking with the mouse button on the still selected items, select the → → choice and then click on the blue scrollbar. That will realign the scrollbars so that they are all at the same horizontal position on the form. The image that follows shows the menu selection, and the one after that the result.
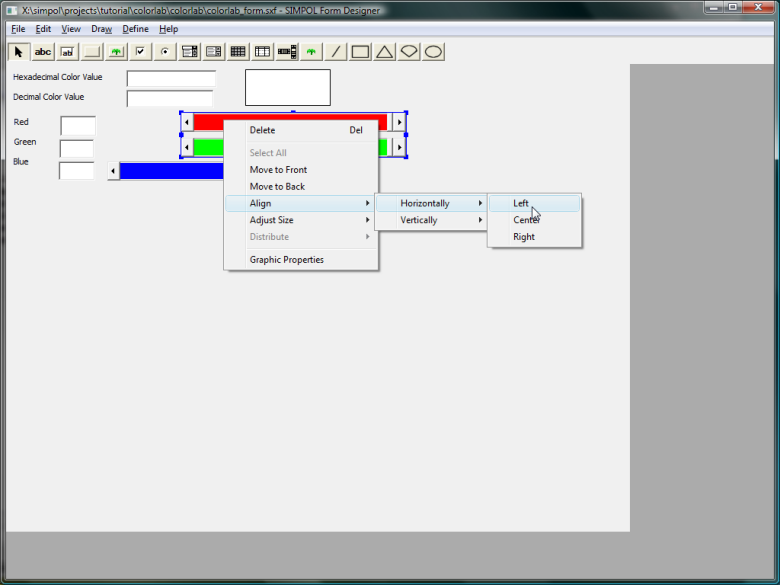
Showing the right-mouse pop-up menu for aligning the selection.
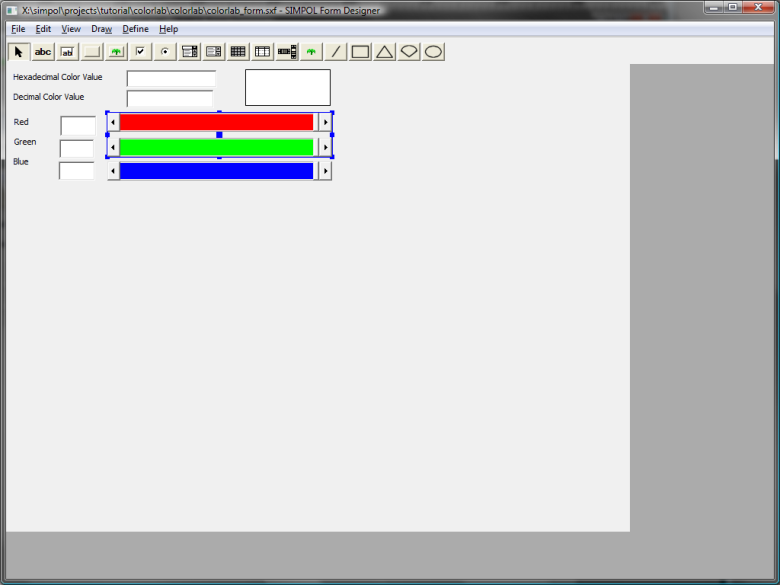
The resulting form after the scrollbars have been realigned.
Now, using the resizing, distribution, and alignment tools, plus the ability to select and then drag the selection around, the form is going to be rearranged. The final result after playing around to get a look that works, can be seen below:
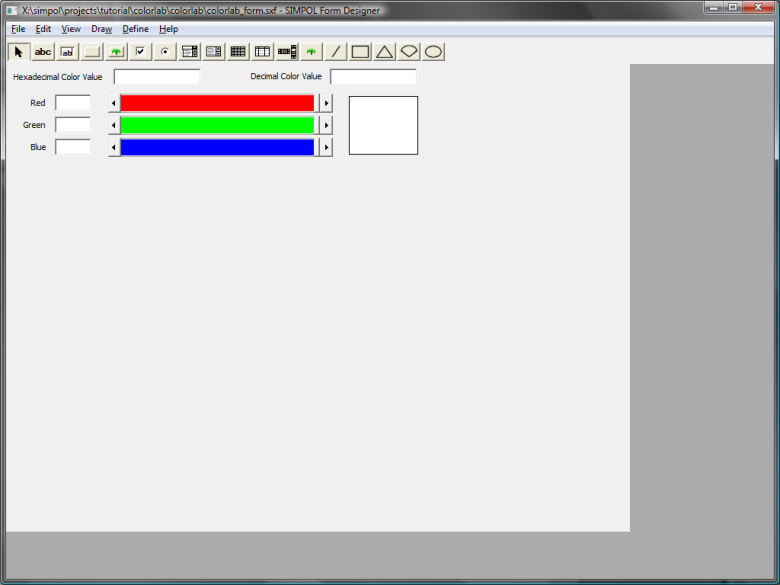
The resulting form after it has been rearranged.
The form is nearly finished. What would be useful is to provide the user with an button as an alternate way of closing the program. Also we should resize the form to fit around the contents without a lot of extra space. The final resulting form looks like this:
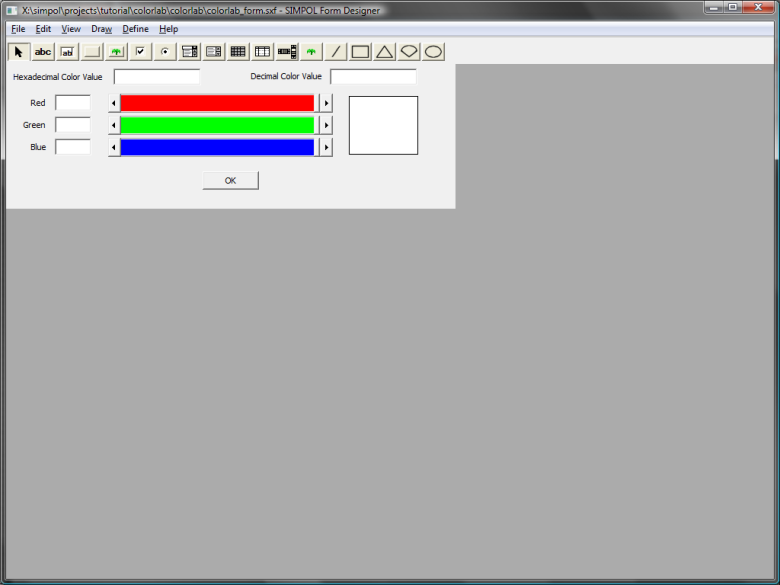
The final version of the form.
Saving the Form
To save the form in a format that can be reopened and modified, select
→ →
Save the form as colorlab_form.sxf in the project directory
that we created earlier in the chapter. The best location would be the
colorlab\colorlab directory, since that
is also where our source directory is located.
For the purpose of this project, we are going to use the form as source code, so let's
also save it off as SIMPOL source code. To do that, select
→ → from the menu. Save the program
as colorlab_form.sma. This should also be saved to the source
directory fro our project. We will be using it in the next section.
That's it! The design portion of our project is done. Now it is time to get on with turning our form into a working program.


