Create the Database
In many cases, a database is a complex set of related tables, each containing a specific
set of information and also fields which link to other tables. In this example, we only really
need one table for now, the "Address" table. To create this table, we need
to start up Superbase NG Personal. Once it is running, select → → . That will display the data source dialog. Since no data sources are currently
open, the combo box with the list of data sources will be disabled and the list of tables will
be empty. In the New *.sbm File Name box enter the location of your
project's bin directory, plus
address.sbm and in the Table Name box enter
Address.
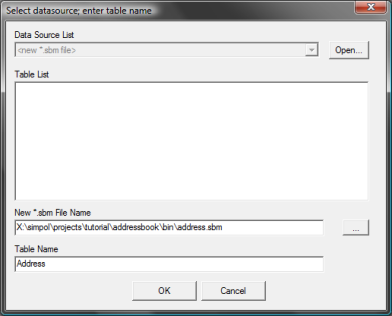
The Superbase NG Personal New Database dialog.
Now click on the button to create the database container and to display the dialog window where we can define the table.
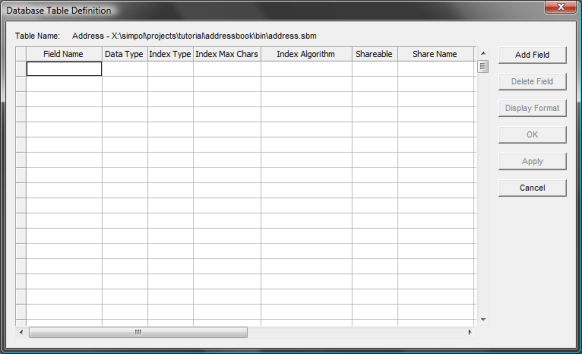
The Superbase NG Personal Database Table Definition dialog.
To add a field, just click on the button. The first
field we will add is the AddressID field. Enter that text into the box and
click on the button. The screen will look like the one below:
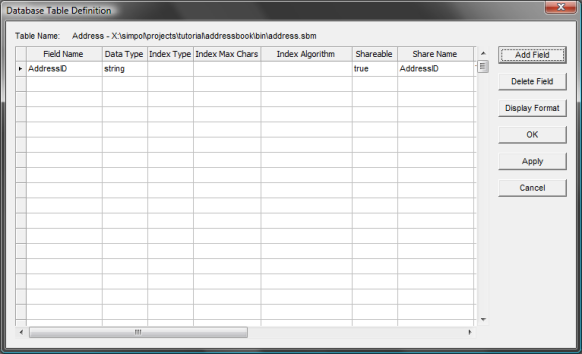
The updated Superbase NG Personal Database Table Definition dialog.
The default data type for a new field in an empty table is string (text). We
will change this after we have added a number of other fields, since the fields inherit the
data type and other characteristics from the currently selected field. For now add the next
field, FirstNames, which will contain the first and any middle names or
initials. Now move the scrollbar at the bottom to the right, to expose some more columns. The
three columns named Shareable, Share Name, and
Share Type are specific to using the multi-user database support, and
can be ignored for now. The default assignments tend to be adequate. The Display
Format column is used for more than one purpose. It is used as part of the
multi-user database engine, but it is also used to supply the desired display format in the
data-aware form environment. It is currently set to 4000 (which happens to be the maximum
length of a text field that can be accessed via the PPCS protocol used for the current
multi-user support. Change that to 30. This column will be the only one we
need to change as we go through them later, but by changing this one now, we may have less to
change later. See the image that follows.
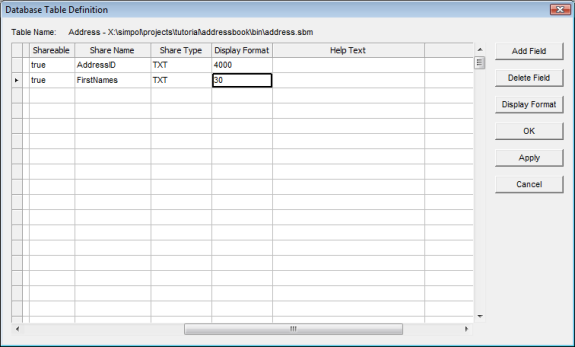
The Display Format column in the Database Table Definition dialog.
![[Note]](images/note.png) | Note |
|---|---|
The SBME database format does not actually have any limitations on the size of a text column, or an integer, etc., but since the initial multi-user support was designed to be 100% compatible with Superbase's PPCS protocol, it has the exact same limitations as well. A later version of the protocol that is not intended to be Superbase compatible is planned, and will support all SIMPOL data types in their full capabilities. Also, the database engine only stores what is there, it uses variable length fields to only take up the space it must. |
Now add the rest of the fields, if the currently selected field is the
FirstNames field, then the length of 30 will also be
inherited. When you get to the Address1 field, change the length to 50, and
then make sure that is selected when adding the rest.
Surname
Address1
Address2
Address3
Address4
City
Region
Postcode
CountryCode
Telephone
Fax
Email
Remarks
Now that that is finished, go through and change the field lengths to 25 for
Postcode, Telephone, and Fax, 80
for Email, and 2 for CountryCode. Now set the
Remarks field to 4000 R, which allows for new line
characters within the field content. The Display Format column should
look like this:
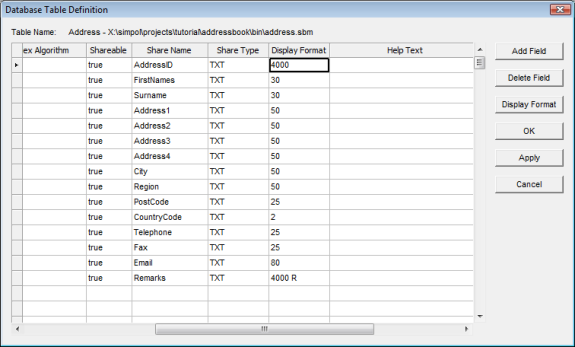
The Display Format column after updating the format entries.
Now scroll back to the left and select the cell for the AddressID
Data Type column. Click again to drop down the selection box, as shown
below, and pick integer. Then pick the cell in the next column,
Index Type, and click again to drop down the selection box, and pick
unique as the index type, then click on the next cell to see the results.
It should look like the following:
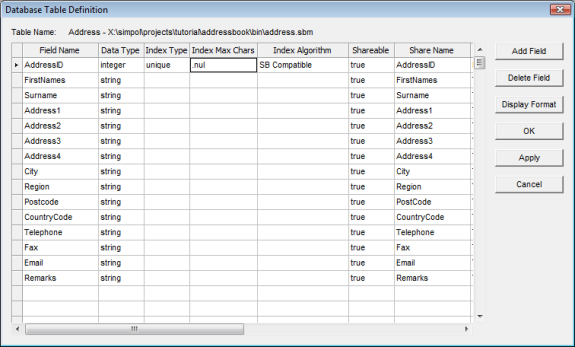
The AddressID entry after changing the data type and adding an
index.
Finally, change the display format from the huge list of 9s to something a little more friendly and clear, such as six 0's, either directly or via the button. Now click on the button to save the table definition off. The final result should now be shown in Superbase NG Personal in Record View, as shown here:
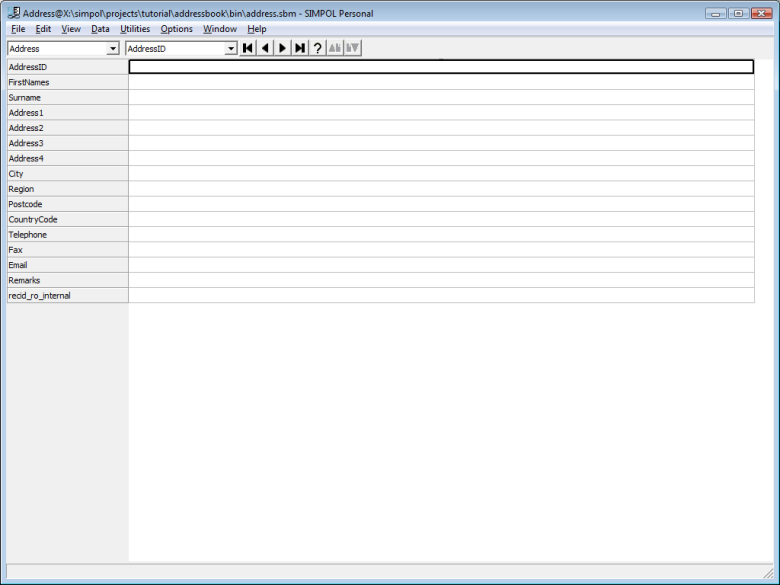
Superbase NG Personal after saving the table definition for the Address
table.


