
| Building the Form | ||
|---|---|---|
 | Chapter 6. GUI-Style Database Programs |  |
Building the Form
Now that our basic database table has been created, it is time to create a form so that we can manage the data effectively and for creating our application. Select → → from the menu to create a new form. Then double-click the mouse button and select the Use system colors check box and click on .
This time, we are going to add a number of controls in one step. Select the edit control
tool from the tool bar, or choose → from the menu, and then starting roughly in the center of the form horizontally
and near the top vertically, drag a rectangle and then let go. In the
Properties dialog, select the Data Table combo box
and from there, select the Address table entry. Then drag select the
entries from FirstNames through Postcode. Then while
holding the Ctrl key depressed, also select the entries:
Telephone, Fax, Email, and
Remarks. When all are selected, click on the check box below the field
list entitled: Create field label. The window should look something like
this:
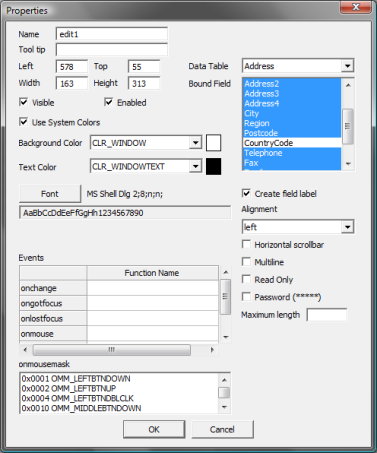
The Properties dialog selecting multiple fields for the edit control.
Now click on the button. On the form, a text control for the label and an edit control for the content will be created for each selected field in the list. They are all created with the same foreground and background colors, so the text controls will need to be adjusted.
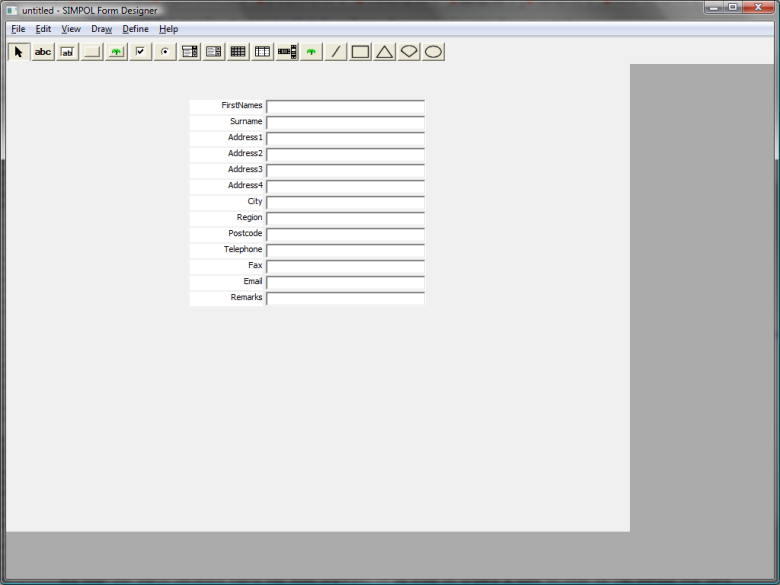
The form after adding multiple controls at once.
To resolve this, click and drag a rectangle around only the label controls. Once all have
been selected, click with the button and from the menu select
the item. In the dialog window, change the
Background Color entry to CLR_BTNFACE and then click
on the button. Now change the Text
Color entry to CLR_BTNTEXT and click on the button. Click on either the or the
gadget to exit.
Now we can position the content, and add the remaining fields. The
AddressID field content is meant to be created programmatically, so it
should be added as a bound text control instead of an edit control. Create the label and
content as separate steps. Move the labels and edit controls into position by selecting the
group and then grabbing the widget at the center (it may not be visible, but the cursor will
change appropriately). For the CountryCode field add a combo box control.
In the dialog, select the CountryCode field from the Bound
Field list.
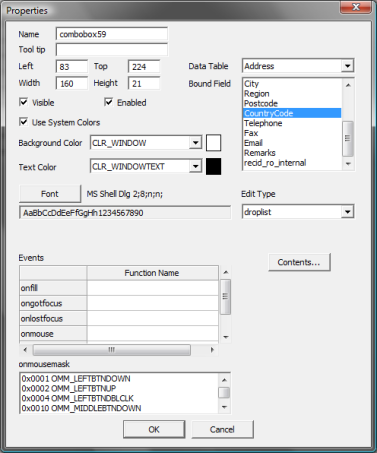
The Properties dialog for the combo box control.
Now click on the button. In the resulting dialog
window, from the List Source Type combo box, select the
static entry. Now in the blank edit control at the bottom of the list,
add the value Canada, then click on the
button. Continue with the values: France, Germany,
Italy, Spain, United Kingdom, and
United States. Also click on the check box entitled: Assign
alternate value if selected. Now in the Value List Contents
section, add the following values in the same way as before: CA,
FR, DE, IT, ES,
GB, and US. The dialog window should look similar to
this:

The List Contents dialog for the combo box control.
The only change remaining is to size the Remarks control larger, and
then double-click on it and tick the Multiline check box so that
formatted text can be added into the control. After rearranging the controls, and resizing the
form (assigning the name addressform to both form and page names), the screen looks like this:
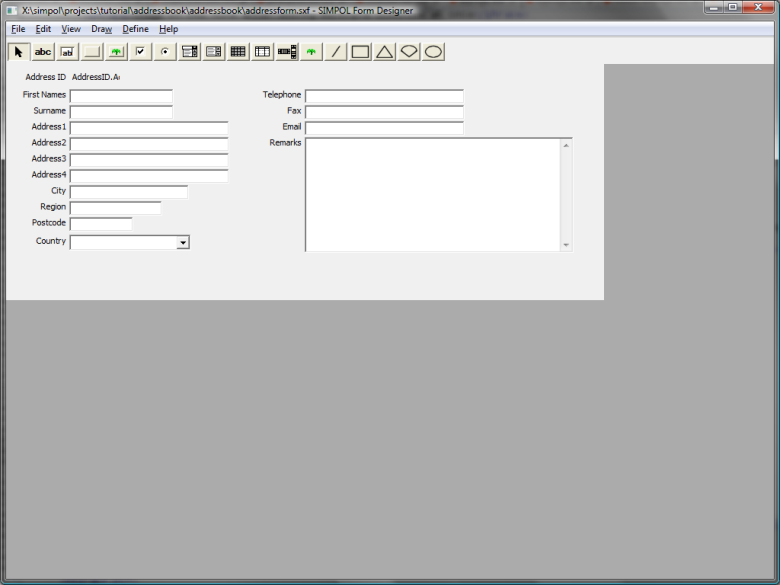
The final look of the form.
To make things a bit more friendly, we will want to put the focus into the first field
when a new record is created, and to make that easier, we should give the
dataform1edit control a more useful name, so double-click on that and change
the control name to tbFirstnames. Now click the
button.
The final bit of tweaking is to modify the tab order. Every single control is part of the
tab order, since in SIMPOL, the tab order and the z-order are the same. Click on the → item and the list of controls will be shown with their names. Now we haven't
bothered to assign special names to the controls this time, so the names won't be terribly
meaningful, but as the controls are selected in the list, a colored border is placed around
each item on the form. Multiple controls can be selected at once, and moved as a block up or
down. Use this tool to arrange the controls in the order desired. Any changes are not
permanent until the button is clicked. Save the form as a form (not
a program) into our project source directory, which is the directory of the same name as the
project below the root project directory. So if the project is called
AddressBook, then it will be in a directory called AddressBook and that will have two subdirectories, bin and AddressBook. The
second of these is the source directory.
Well, so far so good. The form has been created and we are ready to start diving into the code, which we will do in the next section.